Friday, February 14, 2014

Wire Wrapped Bangles

Wire Wrapped Bangle Bracelets

Today I am going to write a tutorial on how to make these cute bangle bracelets. They're really simple and look great, plus the items you'll need will probably already be in your stash (or at least cheap to purchase).


Step one: Gather your supplies.

  • You'll need a thick wire. I'm using what I believe is about an 18 gauge. (It was given to me in a large, unlabeled spool by my father.) You can use any gauge, as long as it is at least thick enough to hold shape.
  • Thin wire. I used 24 gauge. This needs to be thin enough to do a lot of wrapping.
  • Beads. Any beads, so long as the hole is big enough to allow them to be strung onto the thicker wire.
  • Jump rings and clasp. This part is optional. I prefer the look of a clasp on my bracelets, but since the wire should be thick enough to hold shape you really don't need a clasp if you don't have/want one.


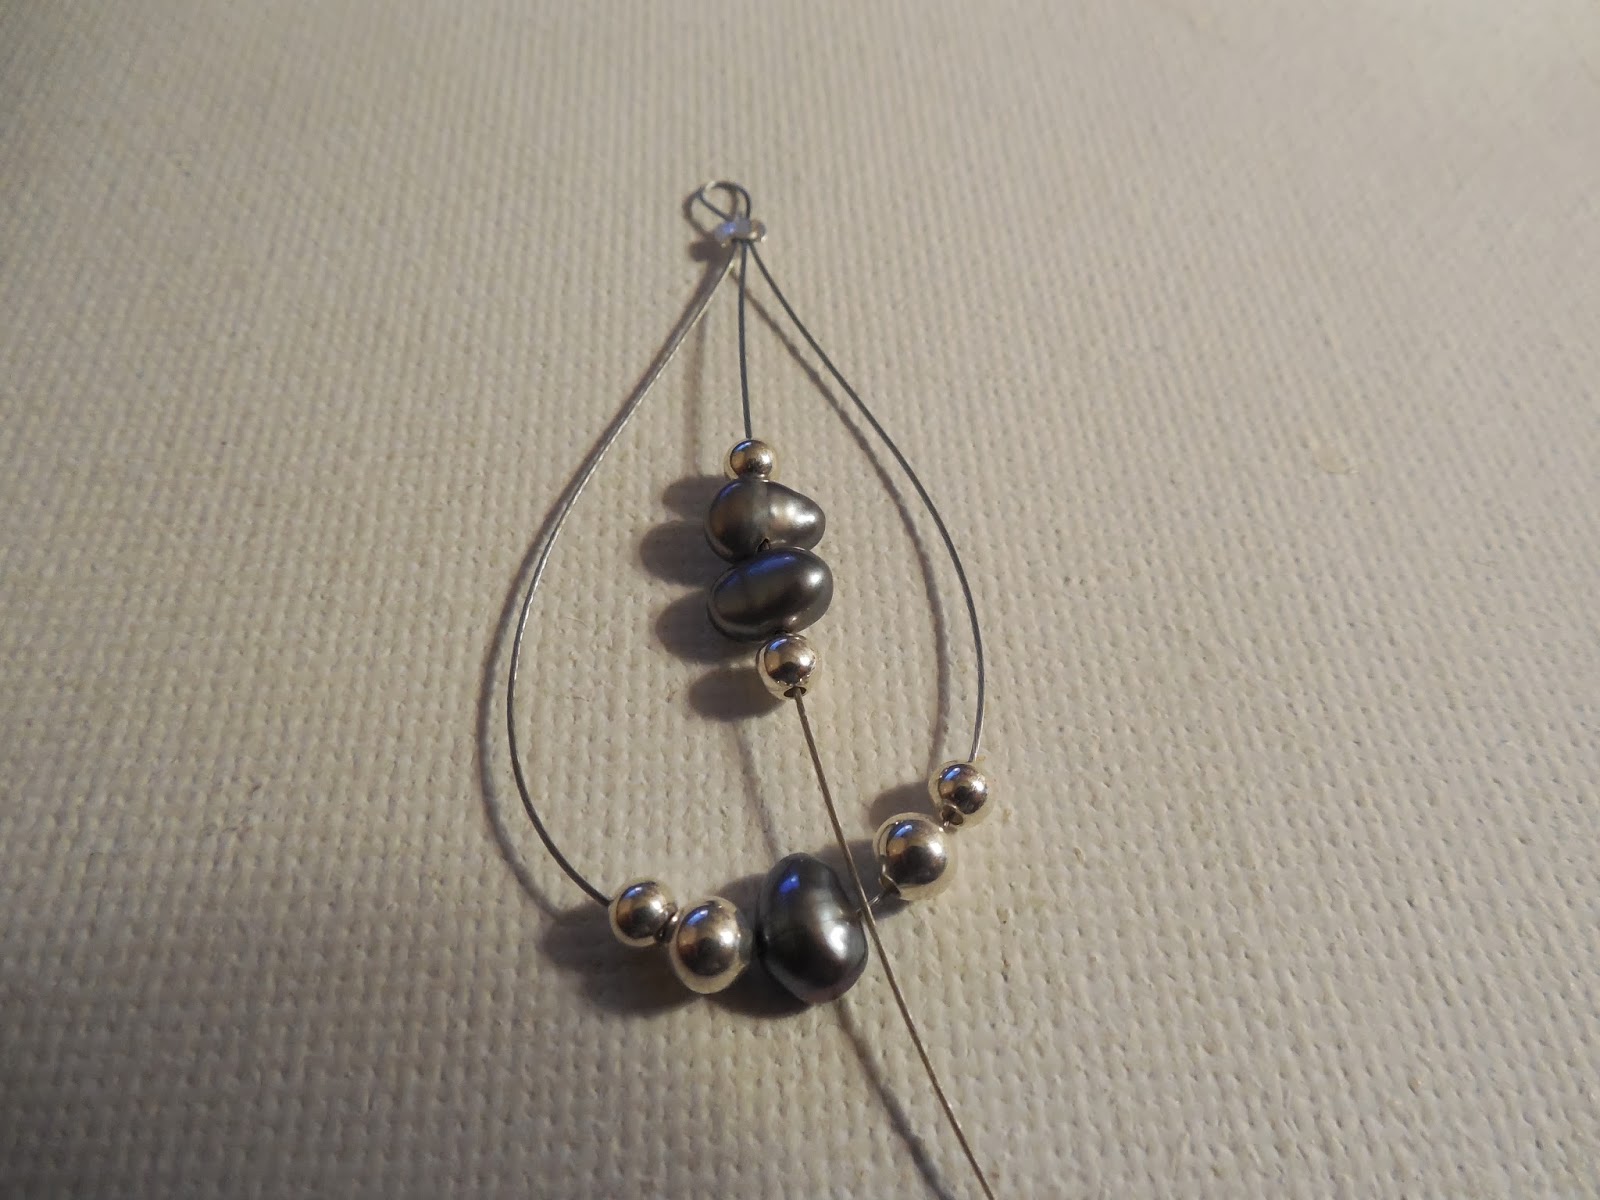
Step two: Cut the 18 gauge wire so that it is long enough to wrap around your wrist with a little extra. Add your beads.


Step three: Bend the wire so that it is a comfortable size and shape for your wrist. Trim the ends so that the tips touch together instead of overlapping, then add little loops.


Step four: Cut your 24 gauge wire and begin to wrap it around the 18 gauge wire. I used about 2ft. This will give you some extra. If you end up not having enough wire, you can simply cut more and continue wrapping with a new piece.


Step five: Wrapping, wrapping, wrapping... This will take a while.


Step six: One side done! Isn't this fun? Other side!


Step seven: Here's where you'll add your clasp. If you've opted not to use a clasp, you're done! If you are using one, proceed to attach it with your jump rings. You could just use the loops on the bracelet itself, but I prefer to add rings.


Step eight: Enjoy! Wear it with pride. Now that you've realized how easy they are to make, you'll be hooked.


Saturday, February 8, 2014

Cute, Simple Beaded Wire Loop Earrings

For my first tutorial, I'm going to show you how to make these bad-boys. They're very fast and easy to do and are made from items that most jewelry crafters will already have in their stash.


A couple things before we begin:

1. Ensure that all lids on all containers are sufficiently closed because (if you're like me) you will be interrupted by cats and dump all of your tiny crimp beads on a carpeted floor. Twice.

2. I am just going to show you how I made mine. You can really make this with any kind of beading wire, beads, components, etc.

3. Have fun! Don't be afraid to tweak it to fit your style.

Okay, here we go.

Step one: As with any project, you'll need to gather your supplies. (The picture only shows enough for one earring because I already had the first earring made.)
  • About 12" of beading wire. This will provide plenty of excess for any errors or if you choose to make your earrings a bit larger. We'll trim it in the end.
  • Two crimp beads. You can use any size really. Mine are a bit bigger than I would have liked just because it is what I already had on hand.
  • Two ear wires. Naturally. How else are you going to proudly display these on your body?
  • Your choice of beads. I used three freshwater pearls, four small silver beads and two larger silver beads. As I said, feel free to substitute and beads that you have in your stash.


Step two: We'll begin by threading the beads that will be in the bottom loop of the earring. 


Step three: Here's where the fun begins. Bend your wire into a loop shape so that the beads you've just strung are situated at the bottom. You can make it any size that you like.


Step four: String your crimp bead onto the long tail of your wire and place it at the top of the loop so that both pieces of wire are inside the crimp.


Step five: Take the LONG tail of your wire and form a much smaller loop. Feed the tip DOWN into the crimp. Pull as tight as desired. This is the loop that will hang on your earwire.


Step six: Crimp. :) Trim the SHORT tail of your wire at the crimp so that it doesn't stick out.


Step seven: At this point you should have a small loop to connect to your earwire, a larger loop strung with beads and the long tail of your wire hanging down the middle. Use this long tail to string the rest of your beads. You can make it as long or as short as you like.


Step eight: Place a crimp bead onto the end of your long tail (below the beads) and crimp to hold the beads in place. Trim your excess wire.


Step nine: Open the loop of your earwire and attach.


Step ten: Feel free to work the wire a little bit so that it hangs just how you want. I bent mine outward slightly at the top crimp so that my loop would be a bit wider. 


Now just wear out and soak up the compliments!